
NOTE: Printing this document may cause printer overflow.
If this occurs, try printing small groups of pages.
American Power Conversion 132 Fairgrounds Road
West Kingston, Rhode Island 02892 Phone (401) 789-5735
Part Number: 996-6005 Revision: 1 Date: 6/9/95 Approved: RM
Note: Specifications contained herein are subject to change without notice.
Copyright © 1995 American Power Conversion. All rights reserved.
These instructions describe how to install the Matrix-UPS Rack Shelf kit into a standard 19 inch (46.5 cm) rack. The steps below consist of installing the Matrix-UPS rack shelf kits into the rack and installing the Matrix-UPS on the shelves. Read these instructions in their entirety before continuing.
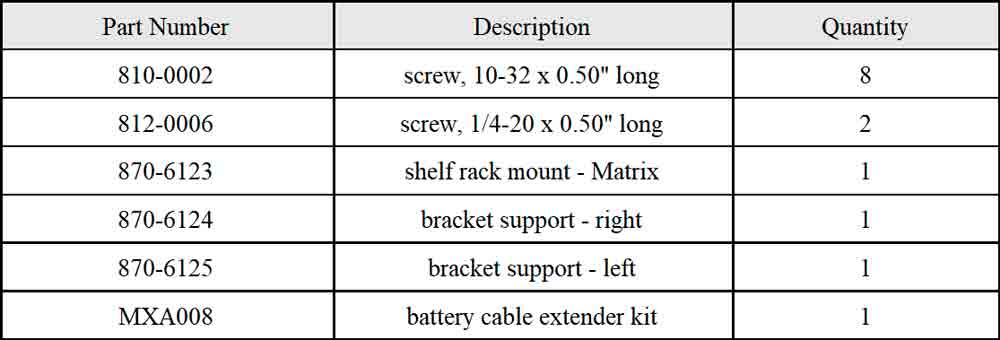
CAUTION! Two people are required to perform the following procedure.
1. Unpack and inspect the Matrix-UPS rack shelf, brackets, and cables. Notify the carrier and dealer immediately if there is damage. If parts are missing, call the appropriate Customer Service telephone number located on the last page of this instruction sheet. Recycle the packaging or dispose of it properly.
2. To install the Matrix-UPS Rack Shelf, you must have room in the rack for the kit. The Matrix-UPS rack shelf kit is ten RU (rack units) high. Ten RU are 17.5 inches (44.45 cm).
3. Test the 10-32 screws that are included in the kit to see if they fit the thread holes in the rack. If the rack screw threads are not 10-32, install appropriate screws for the rack.
4. Determine the placement of the Matrix-UPS rack shelf in the rack by deciding whether the shelf should be mounted to align on the RU boundries (on top of any equipment mounted below), or whether it should be offset mounted by 1/2 RU to allow breathing space between the rack and other equipment for cables and wiring.
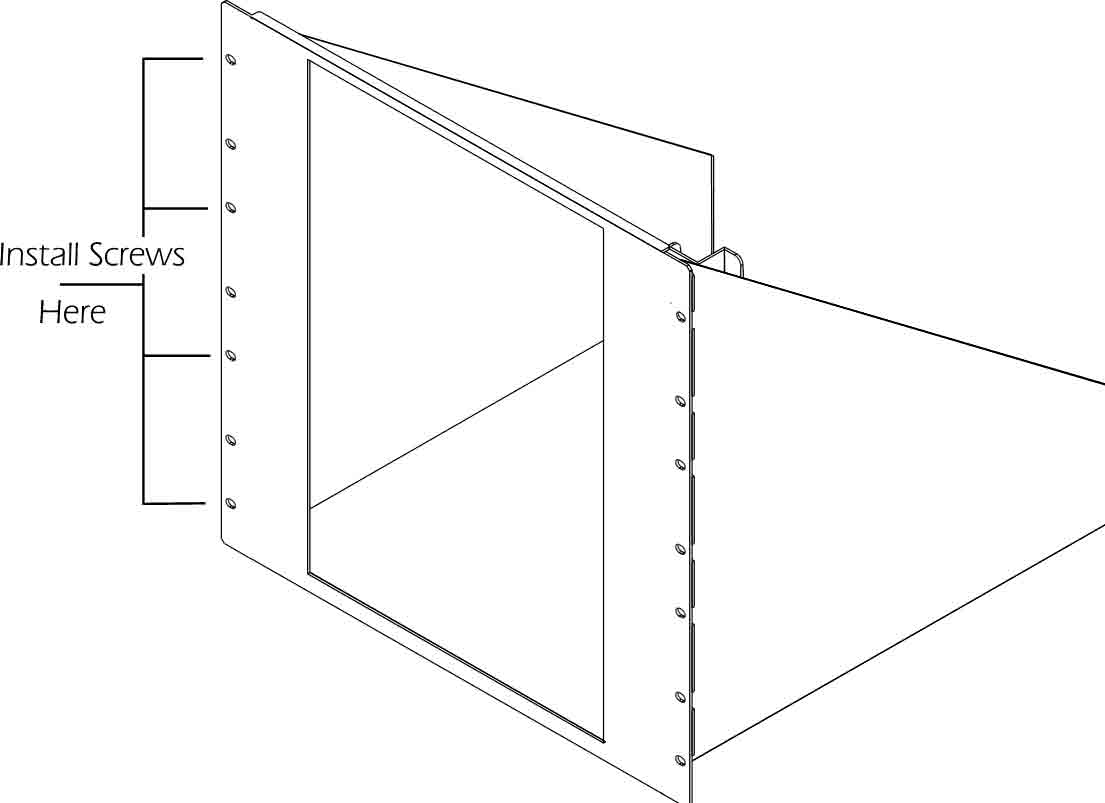
Figure 1. Rack Shelf - Front View
5. Using two people, install the shelf in the rack by aligning the holes in the matrix shelf to the holes in the rack. Secure the shelf in place using a No. 2 Philips head screwdriver and eight screws (four screws on each side). Refer to figure 1 for mounting holes. Note: Be sure to install one screw into the bottom most hole of the shelf to support the weight of the matrix.
6. Install either the Matrix-UPS (see User's Manual), one Smart Cell XR, or up to four Smart Cells onto the Matrix-UPS rack shelf.
7. To prevent the UPS components from moving, install the two support brackets included in the rack shelf kit. Using the two screws (1/4-20), install the left and right support brackets to the outer most holes at the bottom rear of the Matrix-UPS rack shelf so that the large tab is in back of the UPS component. Refer to figure 2.
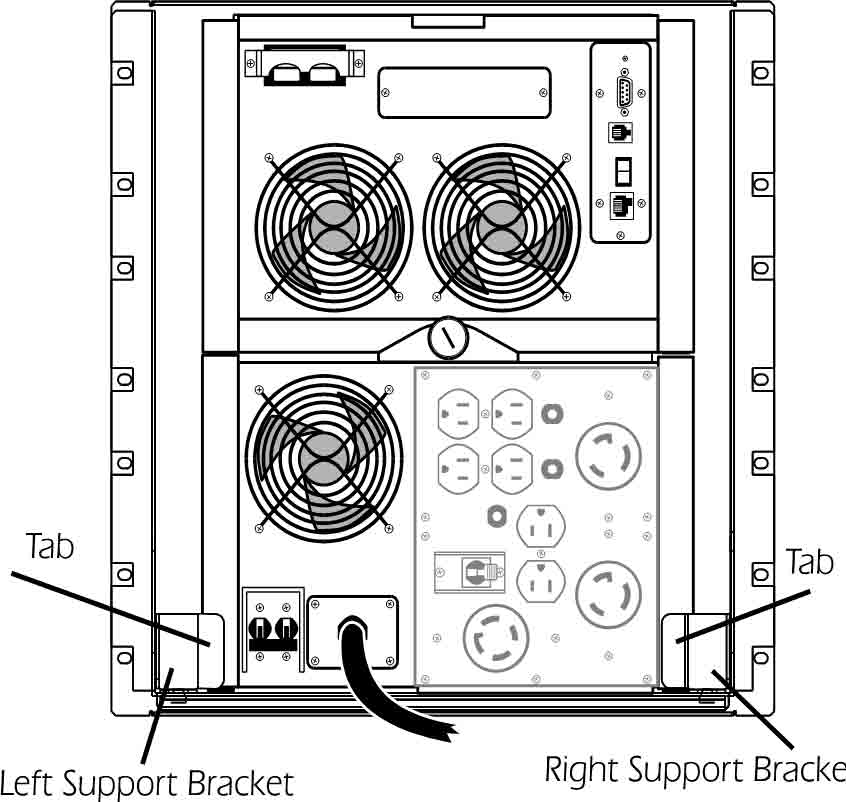
Figure 2. Rack Shelf - Rear View
8. Install the battery extender cable as instructed on the instruction sheet included in the battery extender cable kit.
9. Using the new 72 inch (182.9 cm) battery communication cable provided in the battery extender cable kit, replace the standard battery communication cable and install as instructed in the Matrix-UPS User's Manual.
10. Using the two cable ties included in the battery extender cable kit, dress excess communication cable with the two cable ties.
***






Letzte Kommentare
Artikel
Fotos
Eigene Seiten